# Welcome!

MyAAC is a free and open-source Automatic Account Creator (AAC) written in PHP. It is easy to configure, compatible with MySQL databases and can be customized with Plugins.

### Responsive Mobile Admin Layout

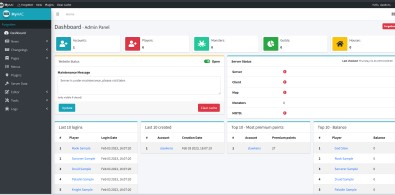
It is a powerful-lightweight fully responsive based on Bootstrap 4, you know that it will look great on any device, whether it's a phone, tablet, or desktop the page will behave responsively!

<figure><img src="/files/ub9GLRc4F0pY0l3OrdES" alt=""><figcaption><p>Responsive Mobile Admin Layout</p></figcaption></figure>

### Powerful News Editor

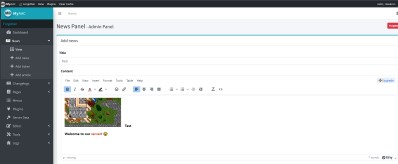
You can edit news in awesome news editor. With support for uploading images. Based on TinyMCE.

<figure><img src="/files/DzHlKeXYuSN0dQGMhWv9" alt=""><figcaption><p>Powerful News Editor</p></figcaption></figure>

### Intelligent Installer

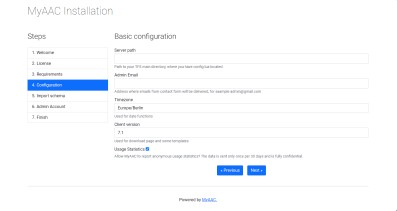
Installer will automatically adjust database for your server.

<figure><img src="/files/RpGmYTsivmvTMg8Bmei8" alt=""><figcaption><p>Intelligent Installer</p></figcaption></figure>


# Quick Start

Here will be description about quick start with docker.

{% content-ref url="<https://github.com/slawkens/myaac-docs/tree/main/broken-reference/README.md>" %}
<https://github.com/slawkens/myaac-docs/tree/main/broken-reference/README.md>
{% endcontent-ref %}


# Troubleshooting

Solutions to common problems

Remember there is also FAQ section on my-aac.org website: <https://my-aac.org/faqs/>

## 1. Errors on installation page

### 1. ZIP Extension not found

MyAAC needs PHP ZIP extension to install plugins.

The extension can be easily enabled in php.ini.

#### Linux

On linux it's even easier because you just need to install following package:

```
sudo apt install php-zip
```

Then restart your webserver:

```
sudo service nginx restart
```

```
sudo service apache restart
```

#### Windows (XAMPP)

Go to Apache -> Config -> php.ini

Uncomment

;extension=zip

By removing semicolon ; from it

#### [Windows (Uniform Server)](/install/windows/uniform-server-recommended)

### 2. config.lua not found

#### There is problem with finding config.lua on linux

It's a problem with permissions file\_exists(config.lua) returns false, even though the file exists

The current solution is to set execute flags on every folder above ots path. So if your config.lua (server) is located in: /home/myuser/forgottenserver/config.lua, then you need to execute following commands:

```
chmod +x /home
chmod +x /home/myuser
chmod +x /home/myuser/forgottenserver
```

And then refresh the installation page again and follow the instructions

## 2. Plugins

### 1. gesior-shop-system - PayPal Points are not being delivered / not coming

1. Ensure you have SSL (https) enabled. This is required for PayPal to safely deliver Instant Payment Notifications (IPNs). You can generate a free SSL certificate via Certbot tool. Just visit its website - <https://certbot.eff.org/> and follow the instructions for your OS / web server.
2. If you are using Cloudflare, you need to add an rule to ignore PayPal IPs. (to do: add screenshots/instructions how to do it).
3. Additionally you can check PayPal IPN History to see the status of requests being sent to your web server. The IPN Status page if available under this address - <https://www.paypal.com/merchantnotification/ipn/history>
4. Check system/logs for paypal logs
5. If you become following entry in system/logs/paypal\_error.log

`[Thu, 01 May 2025 23:13:50 +0200] Payment status is 'Pending'. Points will be added automatically after status is changed to 'completed'. Please wait.`

It means the account email on PayPal website is not verified.


# Linux

The recommended way to install the latest release of MyAAC is to clone the repository with git.

In this tutorial we are assuming that you are using Ubuntu, but it should work with any linux.


# Configure web server

First we will configure the web server, so it will serve our website.

There are many possible options to use, but in this tutorial we will just cover the two most populars:

1. [apache2](#option-1-apache2) and
2. [nginx](#option-2-nginx)

### Update system first

Before we continue, lets ensure we have the latest list of packages for our system:

```bash
sudo apt update
```

## Option 1: apache2

### **1. Install apache2 with php and all required extensions if you still didn't have.**

```bash
sudo apt install -y apache2 php php-zip php-xml php-mysql php-gd php-bcmath php-apcu
```

### **2. Edit `/etc/apache2/sites-enabled/default.conf` or `000-default.conf`**

Set `DocumentRoot` `/var/www/myaac`.

```
DocumentRoot /var/www/myaac
```

### **3. Add following directives between `<VirtualHost>` block.**

```
<Directory "/var/www/myaac">
        AllowOverride all
        Order Deny,Allow
        Allow from all
        Require all granted
</Directory>
```

With this we say that we allow all users to access our website, and that we allow customisations through .htaccess files.

### **4. Restart apache**

```bash
sudo service apache2 restart
```

## Option 2: nginx

### **1. Install nginx with php and all required extensions if you still didn't have.**

```
sudo apt install -y nginx php-fpm php-zip php-xml php-mysql php-gd php-bcmath php-apcu
```

### **2. Edit `/etc/nginx/sites-enabled/default`**

You can take following configuration as an example: [nginx-sample.conf](https://raw.githubusercontent.com/slawkens/myaac/refs/heads/main/nginx-sample.conf)

Don't copy it 1:1, but take it as example, how your config might look like.

Replace server\_name with your domain, and adjust fastcgi\_pass to your PHP version.

The most important parts of this config, are those two:

#### 1.

```
location ~ /system {
    deny all;
}
```

This one blocks access to system folder, where logs and source code is stored: If you don't add it, anyone will be able to read your PayPal logs (for example)!!!

#### 2.

```
location / {
    try_files $uri $uri/ /index.php?$query_string;
}
```

This one is not so dangerous, but without it, you won't be able to see some pages:

### **3. Restart nginx**

Finally, we can restart the nginx to make our changes happen.

```bash
sudo service nginx restart
```


# Install with git

Next we will download & install MyAAC with git.

### 1. Install git

```bash
sudo apt install git
```

### 2. Enter the desired folder where you want to install myaac.

On linux, this can be /var/www

```bash
cd /var/www
```

### 3. Clone the repository from github

```bash
git clone https://github.com/slawkens/myaac.git
```

### 4. Enter the folder

```bash
cd myaac
```

### 5. Adjust file permissions

Change file owner to www-data (web user)

```bash
sudo chown -R www-data:www-data /var/www/*
```

Set proper file flags (with chmod)

```bash
sudo chmod 660 images/guilds
sudo chmod 660 images/houses
sudo chmod 660 images/gallery
sudo chmod -R 760 system/cache
```

### 6. Install Composer

Visit <https://getcomposer.org/> for more instructions.

### 7. Install Composer dependencies

After installing composer, install dependencies with following command

```bash
php composer.phar install
```

or just

```bash
composer install
```

(depends on how you installed the composer on your system)

### 8. Install NPM

Visit <https://docs.npmjs.com/downloading-and-installing-node-js-and-npm> for more instructions.

TLDR: (Execute following commands to install the latest version of Node.js and NPM on Ubuntu)

#### 1. Download NVM (Node Version Manager)

```bash
curl -o- https://raw.githubusercontent.com/nvm-sh/nvm/v0.40.2/install.sh | bash
```

#### 2. Reconnect ssh client (for example: Exit and login with putty)

#### 3. Verify installation

```bash
command -v nvm
```

If it's ok, you should see "nvm" printed.

#### 4. Install node

```bash
nvm install node # "node" is an alias for the latest version
```

#### 5. Update NPM to latest version

```bash
npm install -g npm
```

### 9. Install NPM dependencies

If you followed the 8. Step, you should have NPM installed. Now you can install the dependencies.

```bash
cd /var/www/myaac
npm install
```


# Serve

Now enter [`http://localhost/install`](http://localhost/install) or any other domain your server is located at.

And follow the installation steps.


# Windows

How to install on windows


# Uniform Server (recommended)

## 1. Download Uniform Server

{% embed url="<https://www.uniformserver.com/>" %}

Extract the folder somewhere on your drive, lets say, drive **D:**

## 2. Delete content of www folder

Go to **D:\UniServerZ\www** and delete all files inside

![](/files/y8mRwRAaTugq4WhOVuZc)

## 3. Enable ZIP extension in UniServerZ

### 1. Stop the Apache Server first:

![](/files/QmpY3FtIDqt48rgP16qH)

### 2. Navigate to PHP -> Edit Basic and Modules ->PHP Modules Enable/Disable

![](/files/D686nCwlkPxarDvX0MhQ)

### 3. Check ZIP Extension

![](/files/CJwRxU7wPOG6OSMKsZcV)

### 4. Start Apache again

![](/files/9ptI8s9cVijvqva66JWf)

## 4. Download MyAAC

Download latest version of MyAAC.

Go to MyAAC GitHub page - <https://github.com/otsoft/myaac>, and navigate to Releases - <https://github.com/otsoft/myaac/releases/latest>

Download the .zipped file from Assets

![](/files/qM0VF0UPTMqeXa8mteFQ)

## **5. Move content of the archive**

Unzip downloaded file - **myaac-0.8.21.zip**, and paste the content into **UniServerZ\www**

So at the end it looks like this:

![](/files/seaiOtK9HA0TOUmNS3Ay)

## 6. Visit <http://localhost>

The installation page should be shown like on the picture.

![](/files/7jLNwgYeZse46EdTWIKr)

If you are using MyAAC 0.9.x, then the install screen will look a bit differently.

## 7. Follow the installation

At the end you should see following screen:

![](/files/Vx93J0VZ0GwLifbQGRa3)


# XAMPP

XAMPP should be used only for development of MyAAC, and not for running a live website.


# Pages

## Create new page

### Through filesystem

Go into `system/pages` Create new file called my-awesome-page.php

Paste this

```php
<?phpp
defined('MYAAC') or die('Direct access not allowed!');
$title = 'My Awesome Page';

echo 'This is my awesome page';
// edit your page content
```

Visit <http://localhost/?p=my-awesome-page> to view the page.

Note: for MyAAC 1.0+ the address will be <http://localhost/index.php/my-awesome-page>

### Through admin panel

Go to `localhost/admin`

Go to `Pages` -> `Add`

Check "Enable TinyMCE"

Now with the visual editor you can edit the page look.

You can also check "PHP" and paste the PHP code in the editor.


# Plugins

## Create new plugin

Go into `plugins` Create new file my-awesome-plugin.json

Paste

```json
{
	"name": "My Awesome Plugin",
	"description": "This is just an example of a Plugin for MyAAC.",
	"version": "1.0",
	"author": "YourNickname",
	"contact": "email@example.org",
	"require": {
		"myaac": "0.9.0",
	},
	"install": "plugins/my-awesome-plugin/install.php",
	"uninstall": [
		"plugins/my-awesome-plugin.json",
		"plugins/my-awesome-plugin"
	]
 }

```

Create directory `my-awesome-plugin`


# About plugins

MyAAC allows customizations with a so-called Plugins system.

Plugins are distributed using .zip archives.

## What can be done with plugins

* Themes (old: templates)
* (Admin) Pages
* Settings
* Commands
* Other custom content (with hooks)

## Install

Visit Admin Page of your server - your-domain.net/admin and from menu go to **Plugins**. From there you can upload the plugin.

You can also install by command line: `cd /var/www/html && php aac plugin:install /path/to/plugin.zip`

## Remove / Uninstall

Plugins can be removed, which erases all the files. Database changes are not reverted. That means any change that plugin made to your database, like adding new table or columns, will **NOT** be removed on removal. This is subject to change, in future versions of MyAAC. Not all plugins can be uninstalled, some of them may require manual remove from a file system.

## Develop

This section should give some basic overview about plugins architecture.

### Structure

* plugins/
  * your-plugin.json
  * your-plugin/ (directory)
    * all files that your plugins use should be placed here.
    * (applies only to 0.8) Except files like templates and pages that currently need to be placed outside of this folder
      * templates in templates/ folder
      * pages in system/pages/
    * (applies only to 1.0+) you can put custom content in the following folders under the plugin:
      * admin-pages/
      * pages/
      * themes/
      * and commands/
    * This allows for high customization through the plugins

### Definition File

Every plugin needs to define some basic options in file called plugin-name.json

Description of attributes in this file:

* **name** Short name of your plugin
* **description** (optional) Briefly description
* **version** Current version of the plugin. In future it may be used to do automatic updates of the plugins.
* **author** (optional) Author or authors of the plugin
* **contact** (optional) Any preferred way to contact the developer. May be e-mail or website.
* **require** (optional) You can define a requirements for your plugin, without them your plugin will be not allowed to install.

  This includes:

  * myaac version
  * php version
  * database version
  * columns in database
  * tables in database
  * PHP Extensions
  * other plugins

  The requirements with underslash (\_) are in Semantic Versioning format (<https://semver.org/>), that tools like Composer are using. These have more options, like defining maximum version.
* **install** (optional) The file specified here will be executed after files has been extracted, using PHP built-in *require* function. You can install database tables here, or do any other operations that should be done only once.
* **uninstall** (optional) This is **not** opposide to "install". Instead, the files defined here will be deleted after user decides to uninstall the plugin.
* **hooks** (optional) Hooks allows executing your code in the specific place of the MyAAC. You can for example run code before the page has been generated, to inject some code into it. From the most importants, those are:

```
define('HOOK_STARTUP', 1); // executed after most of the AAC components has been initialized, so there is database connection, server status is checked and migrations are done.
define('HOOK_BEFORE_PAGE', 2); // before page will be included, can return false to omit page loading
define('HOOK_AFTER_PAGE', 3); // after page
define('HOOK_FINISH', 4); // last line of the index.php script, no other thing can be executed later ;)
```

and also:

```
define('HOOK_LOGIN', 13); // executed on succesfull login
define('HOOK_LOGIN_ATTEMPT', 14); // executed on unsuccesfull attempt
define('HOOK_LOGOUT', 15); // executed on logout
```

[Hooks tutorial](https://github.com/slawkens/myaac-docs/tree/main/customize/plugins/customize/plugins/hooks.md)

For other hooks look in:

* **system/hooks.php** (myaac 0.8)
* **system/src/global.php** (myaac 1.0+).


# Compatibility

Here's a list of biggest changes in structure and functions of MyAAC that may require you to define in your plugin manifest json file different minimal MyAAC version to be supported.

You can define the minimum version on which MyAAC plugin can be installed like this: (in your .json file)

```
"require": {
	"myaac": "0.4.3"
},
```

## Versions:

### v0.3.0

* added Twig template engine

### v0.4.0

* Automatically detect json file in .zip instead of basing on filename (admin panel - plugins installer)

> in this update your plugin json file doesn't need to have anymore the same name as .zipped file. Like my-plugin.zip, then plugin.json location should be plugins/my-plugin.json. From now you can use custom names like my-plugin.zip and plugins/another-name-for-this.json. We still however, advice you to use same name of plugin like the name of .zip file to support older MyAAC versions.

### v0.5.0

* moved .htaccess rules to plain php (index.php)

> This adds new addresses like /account/manage or /account/create

* added option to uninstall plugin
* added option to require specified myaac, php or database version for plugins, without that plugin won't be installed
* added admin panel custom links support - for future plugins. You can hook you menus on plugin install into `myaac_admin_menu` table

### v0.6.1

* new configurable: session\_prefix, to allow more websites on one machine (must be unique for every website on your dedicated server!

> You should be using now functions: getSession(key) and setSession(key, value) for dealing with user session data. This way session\_prefix will be automatically appended to the session name.

### v0.6.2

* added forums for guilds and groups
* added items.xml loader class and weapons.xml loader class, they're now saved in database, and you can use them in your plugin

### v0.7.0

* moved template menus to database, they're now dynamically loaded

### v0.8.0

* Admin Panel - Modules showed on Dashboard - for example can be statistics
* colorful Menus:

> possibility to define colors and "Open in New Tab" on Template Menus (needs to be supported by Template)

* new configurable: "env" (Environment)
* comments are now allowed inside plugin json file (php style)
* new require options for plugins: (look into example.json)
  * require database version, table or column of the MyAAC schema
  * require php-extension
* new hooks: LOGIN, LOGIN\_ATTEMPT, LOGOUT, HOOK\_ACCOUNT\_CREATE\_\*
* $cache variable was removed, use `$cache = Cache::getInstance()` instead
* new functions:
  * config($key), configLua($key)
  * clearCache()
  * OTS\_Account:
    * getCountry()
    * setLastLogin($lastlogin) (@Leesneaks)
    * setWebFlags(webflags) (@Leesneaks)
  * OTS\_Player:
    * getAccountId()
    * countBlessings() (@Leesneaks)
    * checkBlessings($count) (@Leesneaks)
  * is\_sub\_dir (in system/libs/plugins.php)
  * Twig:
    * getPlayerLink($name, $generate = true)
  * removed SQLquote and SQLquery from OTS\_Base\_DB
  * Add optional $params param into log\_append (will log arrays)

### v0.8.8

* Change PHP Required: 7.2.5
* updated Twig from version 1.x to 2.x (v2.15.4)
* New hook:
  * HOOK\_EMAIL\_CONFIRMED

### v0.8.9

* add PLUGINS dir to twig paths

> you can now include twig template inside your plugins folder `$twig->display('your-plugin/example.html.twig');`

* plugins folder is now accessible from public, you can place assets there
* added tables.headline.html.twig

### v0.8.10

* allow pages to be placed in templates folder

### v0.8.11

* New functions:
  * Cache::remember($key, $ttl, $callback)
* New characters page hooks
  * HOOK\_CHARACTERS\_BEFORE\_SKILLS
  * HOOK\_CHARACTERS\_AFTER\_SKILLS
  * HOOK\_CHARACTERS\_AFTER\_QUESTS
  * HOOK\_CHARACTERS\_AFTER\_EQUIPMENT
  * HOOK\_CHARACTERS\_BEFORE\_DEATHS

### v0.8.13

* Twig context for hooks - this way you can get variables from parent template in hooks

### v0.8.17

* TwigTypeCastingExtension (<https://github.com/slawkens/myaac/commit/7181b988e9518320d57486670ca4e2d3b2fe1cfa>)
* can be used to cast variables in Twig

### v0.8.18

* Added hook: HOOK\_GUILDS\_AFTER\_INVITED\_CHARACTERS for Guild Wars

### v0.8.19

* better tables.headline.html.twig (patched from 1.0)
* new functions: getGuildNameById($id) + getGuildLogoById($id) + Plugins::installMenus($templateName, $menus, $clearOld = false)
* new hooks: HOOK\_ACCOUNT\_CREATE\_AFTER\_SAVED, HOOK\_ACCOUNT\_MANAGE\_BEFORE\_GENERAL\_INFORMATION, HOOK\_ACCOUNT\_MANAGE\_BEFORE\_PUBLIC\_INFORMATION, HOOK\_ACCOUNT\_MANAGE\_BEFORE\_ACCOUNT\_LOGS, HOOK\_ACCOUNT\_MANAGE\_BEFORE\_CHARACTERS, HOOK\_INSTALL\_FINISH, HOOK\_ACCOUNT\_CREATE\_CHARACTER\_\*
* syntactic sugar for db structure changes (<https://github.com/slawkens/myaac/commit/e0036a3e32e8c37c28665dd7ae18ac9b8fc167d9>)
* support for button\_color (red, green, blue) in buttons.base.html.twig (<https://github.com/slawkens/myaac/commit/b2c9eb474513650a014352d820602b8007eb3bf3>)

### v1.0 (current stable, main branch)

* new pages, commands and themes can be placed directly in plugins folder. The respective folder are following:
  * You need just to place them in correct folder, and they will be loaded automatically - this allows better customization, without interfering with core AAC folders. This will allow in the future automatic updates for plugins as well the AAC as whole.
    * pages/
    * commands/
    * themes/
      * autoload of pages, commands and themes is configurable (<https://github.com/slawkens/myaac/commit/c1d4b4f80cd6bb85507ee9471e47013955a26a91>)
* composer is now used for external libraries
* new console script: aac - using symfony/console
  * usage: `php aac` (will list all commands by default)
  * example: `php aac cache:clear`
  * example: `php aac plugin:install theme-example.zip`
* Plugin cronjobs: central control of the cronjobs
* New exception handler: Whoops
* replace POT Query Builder to Eloquent ORM
* config.php moved to Admin Panel -> Settings page
* schema: Change character set to utf8mb4 (support for Emojis in Menus/Pages/News/Forum etc.)
* allow OTS\_Player to be passed as object to getPlayerLink
* refactor getTopPlayers function (support for balance)
* Bugtracker has been moved to Plugins
* new routing engine. Routes can be added to plugins. Thus removing the need of inserting the page into system/pages.

```json
"routes": {
	"First Route": {
		"pattern": "/YourAwesomePage/{name:string}/{page:int}",
		"file": "plugins/your-plugin/your-awesome-page.php",
		"method": "GET",
		"priority": "130"
	},
	"Redirect Example": {
		"redirect_from": "/redirectExample",
		"redirect_to": "account/manage"
	}
}
```

* option to disable/enable plugin from admin panel
* templates: new config option - menu\_default\_color
* add $whoopsHandler as variable
* new hooks for news management (<https://github.com/slawkens/myaac/commit/011a85d8ae34283ded6999882833f9d4797028ec>, <https://github.com/slawkens/myaac/commit/36bd3eb846e829b45313e10f7568dc4e95841143>)
* new functions
  * getBanReason($reasonId), getBanType($typeId)
  * getChangelogType($v), getChangelogWhere($v)
  * getPlayerNameByAccount($id)
  * Outfits\_loadfromXML(), Mounts\_loadfromXML()
  * left($str, $length), right($str, $length), between($x, $lim1, $lim2), truncate($string, $length)
  * getCreatureImgPath($creature), getItemRarity($chance)
  * getAccountLoginByLabel()
  * getGuildNameById($id), getGuildLogoById($id)
  * camelCaseToUnderscore($input), removeIfFirstSlash(&$text)

### v1.0.1

* Updated libs:
  * twig from ^2.0 to ^3.11
    * The "if" statements in "for" loops are not allowed anymore, this will cause an exception
  * tinymce from ^6.8.3 to ^7.2.0
  * cypress from ^12.12.0 to ^13.17.0
  * nesbot/carbon from 2.72.5 to 2.72.6

### v1.2

* Add HOOK\_INIT, executed just after $hooks are loaded
* Twig:
  * Add template\_name to twig variables
  * Add session(key) function + reworked session functions to accept multi-array like in Laravel
* Settings: password input hide/show, for sensitive data like API keys
* Rework menus: Different categories can have different colors + Option to reset menus

### v1.4

* Plugins:
  * json: Plugin name is required, a version is optional now
  * Feat: admin-pages (can add admin pages through plugins) (<https://github.com/slawkens/myaac/commit/ceaa0639e66d31e8177ff90791463470367aa45d>)
* Functions:
  * db->hasTableAndColumns(table, columns)
* Twigs: Add noSubmit option to buttons.base

### v1.5

* Twig:
  * Filter hooks: <https://github.com/slawkens/myaac/pull/258>
  * Add db variable to twig
  * Possibility to use a custom **views/** folder in the themes for twigs, for better organization
* Settings:
  * Add float and double types

### v1.7

* Plugins:
  * Add version check from plugins repo API
* New hooks:
  * HOOK\_ACCOUNT\_MANAGE\_AFTER\_CHARACTERS
  * HOOK\_GUILDS\_AFTER\_MANAGE\_BUTTON

### v1.8.1

* New Commands:
  * plugin:enable/disable/uninstall {plugin-name}

### v1.8.2

* Routes:
  * Possibility to override routes with plugins pages, like characters.php - No need to define routes in plugin.json anymore

### v1.8.3

* New config:
  * hooks\_debug (To view where hooks are located in .twig files), set it to true in config.local.php to activate it
* New Functions:
  * db->getColumnInfo(table, column)
* Router:
  * Add an option to use ?subtopic=page-name for pages loaded by plugins (easier migration from 0.8.x)
* getTopPlayers() Function - Add lookmount & promotion
* New hooks:
  * HOOK\_ACCOUNT\_CHANGE\_PASSWORD\_AFTER\_OLD\_PASSWORD
  * HOOK\_ACCOUNT\_CHANGE\_PASSWORD\_AFTER\_NEW\_PASSWORD
* Cache::remember $ttl = -1 = infinite

### v1.8.5

* Settings: escapeHtml in values (support for HTML code)
* Plugins System: Add plugin:remove + plugin:delete as alias for plugin:uninstall + plugin:activate/deactivate

### v1.8.6

* New hook for validate character name:
  * HOOK\_FILTER\_VALIDATE\_CHARACTER\_NEW\_NAME

### v1.8.8

* Twig: Extract $twig→renderInline(content, context) as a method
* Settings:
  * Fix variable overlapping if the same var name as in core
    * You can now use a variable called env or anything you wish
  * Settings: show\_if works for the select's now
* New hooks for the change-comment page:
  * HOOK\_ACCOUNT\_CHARACTERS\_CHANGE\_COMMENT\_AFTER\_SUCCESS
  * HOOK\_ACCOUNT\_CHARACTERS\_CHANGE\_COMMENT\_AFTER\_NAME
  * HOOK\_ACCOUNT\_CHARACTERS\_CHANGE\_COMMENT\_AFTER\_HIDE\_ACCOUNT
  * HOOK\_ACCOUNT\_CHARACTERS\_CHANGE\_COMMENT\_AFTER\_COMMENT

### v1.9.0

* New hook: HOOK\_FILTER\_MAIL

### v2.0-alpha (development version)

* Add the possibility to fetch skills, balance and frags in the getTopPlayers function (#347)
* Reworked account action logs to use a single IP column as varchar(45) for both ipv4 and ipv6 (#289)
* Plugins: autoload init-priority option
* Make myaac\_config table columns bigger (key from 30 to 255 and value from 1000 to 10000)
* Do not save sessions in myaac system folder (<https://github.com/slawkens/myaac/commit/6f2bfd21eb7657e98a71ab09c20e2b39fd1cfbdd>)


# Hooks

Hooks aka events system allows you to customize AAC and inject code in places you want.

In this capitel the most important hooks will be listed.

Hooks need to be defined in plugin .json file.

Example:

```json
"hooks": [
	{
		"type": "HOOK_ADMIN_MENU",
		"file": "plugins/my-plugin/hooks/admin-menu.php"
	},
```

Type is hook name, and file is path to file on filesystem.

### HOOK\_TWIG

Params: $twig, $twig\_loader

This hook allows you to add custom functions to twig template engine.

This example adds a custom function.

```php
<?php
use Twig\TwigFunction;

$function = new TwigFunction('myFunction', function ($param1, $param2) {
	return $param1 . $param2;
});

$twig->addFunction($function);
```

Then in twig template, you use it:

```
{{ myFunction('Hello', 'World') }}
```

### HOOK\_LOGIN

Params: $account (OTS\_Account), $password, $remember\_me (bool)

Executed after successful login. You can use it to add login history.

### HOOK\_LOGIN\_ATTEMPT

Params: $account (account name, number or id), $password, $remember\_me

Executed after failed login attempt. You can add here custom logic to handle such cases - like a email notification or logging.

### HOOK\_LOGOUT

Params: account\_id (account id of the logging out account)

Executed after user logouts.

### HOOK\_BEFORE\_PAGE

Allows you to do custom stuff before page is loaded. You can add here code that will be displayed above page.

If you return false in this hook, then the page won't be loaded. You can use it to display custom things.

This example will block every page and show instead a message: Hello World!

```php
<?php

echo 'Hello World!';
return false
```

### HOOK\_ADMIN\_MENU

This hook allows you to add/modify menus in admin panel.

This example adds "Gifts System" group with two links: Offers + Add Offer

```php
<?php
global $menus; // this is required to access array of menus

$menus[] = [
	'name' => 'Gifts System', 'icon' => 'gift', 'order' => 111, 'link' => [
		['name' => 'Offers', 'link' => 'gifts', 'icon' => 'list', 'order' => 10],
		['name' => 'Add Offer', 'link' => 'gifts&action=offer_form', 'icon' => 'plus', 'order' => 20],
	],
];
```

### HOOK\_INSTALL\_FINISH

Executed on the last page of the installation. Use if you have custom database changes you want to install.

### HOOK\_EMAIL\_CONFIRMED

Params: $account (OTS\_Account)

Executed after user clicks link in email and confirms his email. Can be used to add custom rewards like items.

### HOOK\_FILTER\_TWIG\_DISPLAY

### HOOK\_FILTER\_TWIG\_RENDER

Params: $args\['viewName']

Both can be used to pass custom parameters to $twig->display and $twig->render.

### HOOK\_INIT

This is the first hook executed after the hooks system is initialized. There is no database connection yet.

### HOOK\_STARTUP

Executed after all systems are loaded. The website is already connected to database, and login system is ready.

### HOOK\_FINISH

This is the last executed hook, after that page is send to browser.


# Admin Pages

You can place your own admin pages. They will be accessible under `/admin`, specifically `/admin/?p=your-page-name`.

Create a file `your-page-name.php` in the `plugins/my-plugin/admin-pages` directory.

```php
<?php
defined('MYAAC') or die('Direct access not allowed!');

$title = 'My Admin Page';

if (isset($_POST['submit'])) {
	// do something with the form data
}

success('Hello from my admin page!');

// display something
$twig->display('your-page-name.html.twig');
```

Now head to admin/?p=your-page-name to see the page live.

You can also add the link to this page in the admin panel.

For that, use the HOOK\_ADMIN\_MENU.

Example: (plugins .json)

```json
"hooks": [
	{
		"type": "HOOK_ADMIN_MENU",
		"file": "plugins/my-plugin/hooks/admin-menu.php"
	},
```

plugins/my-plugin/hooks/admin-menu.php:

```php
<?php
global $menus; // this is required to access array of menus

$menus[] = [
	'name' => 'My Page', 'icon' => 'gift', 'order' => 111, 'link' => 'your-page-name',
	],
];
```


# Settings

You can add your own settings to the admin panel.

For that, define following in your plugins .json file:

```json
"settings": "plugins/my-plugin/settings.php",
```

Now open plugins/my-plugin/settings.php and paste following, this is just a basic example:

```php
<?php

return [
	'name' => 'My Plugin', // name that will be displayed under Settings menu in Admin Panel
	'key' => 'my_plugin', // will be used with setting() function, must be unique for every plugin
	'settings' =>
	[
		[
			'type' => 'section',
			'title' => 'Section Name'
		],
		'enabled' => [
			'name' => 'Enable Something',
			'type' => 'boolean',
			'desc' => 'Enable something',
			'default' => false,
		],
		'type' => [
			'name' => 'ReCaptcha Version',
			'type' => 'options',
			'options' => ['v2-checkbox' => 'v2-checkbox', 'v2-invisible' => 'v2-invisible', 'v3' => 'v3'],
			'desc' => 'Type of ReCaptcha',
			'default' => 'v3',
			'show_if' => [
				'enabled', '=', 'true',
			]
		],
	]
];
```

Now you can access the settings in PHP by using function: `setting('key.option')`, example: `setting('my_plugin.enabled')`.

Following "type" are allowed:

### New Tab (category)

```php
[
	'type' => 'category',
	'title' => 'My Category Title'
],
```

### New Header (section)

```php
[
	'type' => 'section',
	'title' => 'My Section Title'
],
```

Note: After category, there is a requirement to add a section, otherwise it will look weird.

### boolean (true/false)

```php
'csrf_protection' => [
	'name' => 'CSRF protection',
	'type' => 'boolean',
	'desc' => 'Its recommended to keep it enabled. Disable only if you know what you are doing.',
	'default' => true,
],
```

### number

```php
'smtp_port' => [
	'name' => 'SMTP Port',
	'type' => 'number',
	'desc' => '25 (default) / 587 (tls - GMail, Microsoft Outlook)',
	'default' => 25,
	'show_if' => [
		'mail_enabled', '=', 'true'
	]
],
```

### text (string)

```php
'google_analytics_id' => [
	'name' => 'Google Analytics ID',
	'type' => 'text',
	'desc' => 'Format: UA-XXXXXXX-X',
	'default' => '',
],
```

### textarea (long text)

```php
'meta_keywords' => [
	'name' => 'Meta Keywords',
	'type' => 'textarea',
	'desc' => 'keywords list separated by commas',
	'default' => 'free online game, free multiplayer game, ots, open tibia server',
]
```

### options (select)

```php
'cache_engine' => [
	'name' => 'Cache Engine',
	'type' => 'options',
	'options' => ['auto' => 'Auto', 'file' => 'Files', 'apc' => 'APC', 'apcu' => 'APCu', 'disable' => 'Disable'],
	'desc' => 'Auto is most reasonable. It will detect the best cache engine',
	'default' => 'auto',
],
```


# Templates

## Create new template

So you want to create a template for MyAAC? That's pretty straightforward!

Templates are placed under **templates/** folder in the MyAAC installation.

> Notice: there is also *system/templates* folder, that serves for different purposes. It is used for HTML Twig templates. Let's distinguish between those two

This tutorial is targeted against version 0.8 and higher of MyAAC. It won't work with 0.7, because there were some incompatibilities being introduced between the releases, like now you use `config('key')` function instead of the global variable `$config['key']`.

### Naming convention

Your main template file where header, footer and content (generally whole HTML structure) are stored should be named **index.php**. And it should be placed inside your template folder like this: *templates/example/index.php*, where *example* is your template name.

Images can be placed into *templates/example/images* but that's up to you how you name the folder. Same with CSS and JavaScript, it's up to you where you place them.

### Protect the script

At the beginning of your template index.php file add this:

```php
<?php
defined('MYAAC') or die('Direct access not allowed!');
?>
<!DOCTYPE html>
<html>
...
```

This protects the script from being directly accessed by browser.

### Configuration (config.ini & config.php)

If you have something that you want to make for the users configurable, you can place it in **config.ini** or **config.php** of your template folder.

> If you want your template to be compatible with **MyAAC 0.7** and lower, then you need to either create config.ini or config.php, both cannot exist cause they won't be loaded by MyAAC!

Syntax of ini is very easy (simple key=value). And its being internally parsed by PHP function [parse\_ini\_file](https://www.php.net/manual/en/function.parse-ini-file.php)

Example of config.ini

```ini
darkborder = "#D4C0A1"
lightborder = "#F1E0C6"
vdarkborder = "#505050"

logo_monster = "Wyrm"
```

Then in your template (index.php) you can use for example:

```php
<?php echo config('logo_monster'); ?> // since 0.8
```

Or:

```php
<?php echo $config['logo_monster']; ?> // 0.7 and older (for compatibility)
```

### Content

Now we came to the most visible part of the page. Content.\
Content is something that dynamically changes between pages. Create account, highscores and downloads page are examples of content.

To place this content on your website use the `$content` variable in your template.

Example:

```php
<div class="panel panel-default">
    <div class="panel-body">
        <?php echo template_place_holder('center_top') . $content; ?>
    </div>
</div>
```

As wrote, `$content` will be dynamically generated with every page refresh and will include the main content of the page.

### Placeholders

MyAAC automatically generates some HTML code for your template to make it easier to develop plugins that can automatically inject code into it. This is:

* META tags (like title, charset, content-language, description and keywords based on configuration)
* jQuery, ReCaptcha and other JavaScript tags
* some CSS stuff

Like wrote, jQuery is automatically included with every template that includes placeholders, so you don't need to include it in your script.

There are 3 place holders that are mandatory (without them your template won't work correctly). Those are: `head_start`, `head_end` and `body_end`.

To include placeholder in your template, just use following PHP Code:

```php
  <?php echo template_place_holder('here_the_name'); ?>
```

Placeholders needs to be located in following places:

* `<?php echo template_place_holder('head_start'); ?>` just after opening `<head>`
* `<?php echo template_place_holder('head_end'); ?>` just before closing `</head>`
* `<?php echo template_place_holder('body_end'); ?>` just before closing `</body>`

#### Optional placeholders

Some optional placeholder is `center_top`.

Its used for example by the plugins [Welcome Box](https://otland.net/threads/myaac-welcome-box-last-joined-best-player-total-houses.268583/) or [Powerful guilds](https://otland.net/threads/myaac-plugin-most-powerful-guilds-tfs-0-3-4-and-1-0.254708/). Plugins can inject here some code that will be displayed just before the `$content`.

Its typical to mix them in one line, so usually you should have something like this:

```php
<?php echo tickers() . template_place_holder('center_top') . $content; ?>
```

### Status

You may wish to add status of the server to your template. For this, you can use the `$status` variable.

Example:

```php
if(!$status['online']) {
	echo 'Offline!';
}
else {
	echo 'Online!';
}
```

Except that, you can use following array-keys:

```php
<?php
echo ($status['online'] ? 'Online' : 'Offline');
echo $status['players']; // number of players online
echo $status['playersMax']; // maximum number of allowed players
echo $status['lastCheck']; // timestamp of the last status check
echo $status['uptime']; // uptime in seconds
echo $status['uptimeReadable']; // uptime formatted (example: **1h 25m**)
echo $status['monsters']; // amount of monsters on server
echo $status['motd']; // motd

echo $status['mapAuthor'];
echo $status['mapName'];
echo $status['mapWidth'];
echo $status['mapHeight'];

echo $status['server'];
echo $status['serverVersion'];
echo $status['clientVersion'];
?>
```

> Notice: Some of these variables are available only if the server is online (`$status['online'] = true`), so you need to check the status first before using them.

### Functions

In your template you can use some helper functions that are specially made for templates.

#### config(key), configLua(key)

Get config option from MyAAC config, or from server .lua file.

> Notice: only MyAAC 0.8 and higher

Example:

```php
<?php
echo configLua('serverName'); // outputs **Forgotten Server**
echo config('server_path'); // outputs **/home/otsmanager/forgottenserver/**
?>
```

#### getLink(name)

Use it to generate links to your pages.

Example:

```php
<li><a href="<?php echo getLink('account/manage'); ?>">My Account</a></li>
<li><a href="<?php echo getLink('creatures'); ?>">Creatures</a></li>
```

#### template\_form()

Use it to place a form on the page where user can change template. Its good practice to make it configurable.

Example:

```php
<?php
    if($config['template_allow_change']) {
        echo '<span style="color: white">Template:</span><br/>' . template_form();
    }
?>
```

#### template\_footer()

Use it to place auto-generated footer on the website. It includes page load time, visitors, copyright notices and famous "Powered by MyAAC." text.

Example: (taken from ShadowCores templates)

```php
    <div class="panel panel-default">
        <div class="panel-heading" style="text-align: center;">
            <?php echo template_footer(); ?><br/>
            <b>Template by:</b> <a href="https://otland.net/members/webo.192791/" target="_blank">Webo</a>.
        </div>
    </div>
```

#### getTopPlayers($amount)

Use it go get top players of the server, wherever you can specify $amount yourself. This function automatically caches the result, so you don't need to care about performance.

Example:

```php
<?php
	$count = 1;
	foreach(getTopPlayers(5) as $player) {
		echo "<li>$count - <a href='"getPlayerLink($player['name'], false). "'>". $player['name']. "</a> <span style='float:right; font-size: 12px; padding-right: 5px;'>Level: ". $player['level'] ."</span></li>";
		$count++;
	}
?>
```

#### tickers()

Use it to place the tickers on the page.

Example:

```php
<?php echo tickers() . template_place_holder('center_top') . $content; ?>
```

For more functions look into [system/functions.php](https://github.com/slawkens/myaac/blob/master/system/functions.php)

### Tipps

#### Display server IP/domain:

For displaying server IP or domain you can use PHP built-in variable `$_SERVER['SERVER_NAME']`;

Example:

```php
IP: <?php echo $_SERVER['SERVER_NAME']; ?>
```

#### Display client version:

Use `$config['client']` divided by 100.

Example:

```php
Client: <?php echo ($config['client'] / 100); ?>
```

#### Display images or include style/javascript to your template folder.

If you place files under your template folder, you can refer to them with the `$template_path` variable.

Normally, you would do it like this:

```php
<img src="templates/example/background.jpg" alt="background"/>
```

But imagine, if you change the name of your template from **example**, to something else, like **example2**.

Then you will need to replace all templates/example in your template! That's may introduce a lot of useless work!

For this, you can use built-in `$template_path` variable.

So, instead do this this way:

```php
<img src="<?php echo $template_path; ?>/background.jpg" alt="background"/>
```

Do same, with including javascript:

```php
<script src="<?php echo $template_path; ?>/js/bootstrap.min.js"></script>
```


# Updating

Updating AAC to the newest version is very simple. Thanks to our migration script, your database schema will be automatically updated when first time visiting the updated site.

To easily update your AAC without conflicts, please use config.local.php to store your config.php changes. This way you won't need to care about config changes that were applied between releases.

## How to use config.local.php?

Copy the config value from config.php and paste it into config.local.php into $config array.

Example: (if you want to modify friendly\_urls from config.php)

Content you need to paste into config.local.php would be then (example):

`$config['friendly_urls'] = true;`

## How to update MyAAC?

1. Download chosen version of MyAAC here: <https://github.com/slawkens/myaac/releases>
2. Unpack it somewhere, lets say **MyAAC-dir**.
3. Copy config.local.php from your old MyAAC installation to some safe place.
4. Copy content of **MyAAC-dir** to your MyAAC installation directory, replace all files.
5. Copy your config.local.php that you saved before to your MyAAC installation directory, replace the old one.
6. Install plugins that you had activated before. You can do this with our command line php script. (To be explained)


# Contributing

## Contributing

Want to help with the MyAAC project?

View what we have to be done, here: [MyAAC TODO](/misc/todo)

If you have other idea - let us known. You can contact us on [Discord Channel my-aac](https://discord.gg/2J39Wus).

### Code Rules

We use [EditorConfig](https://github.com/slawkens/myaac/blob/main/.editorconfig) to force some rules, please follow them in your editor. You can find plugin for IDE of your choice here: <https://editorconfig.org/#download>

Except that, please follow some other rules:

* look how our PHP code is formatted, and do the same

### Is the contribution you want to do a template or page?

Then think about creating a separate plugin for MyAAC. You can then submit the code directly to [myaac-plugins](https://github.com/slawkens/myaac-plugins) repository. If it pass some requirements tests, it will be merged into the repository.


# TODO

## MyAAC TODO

This is a list of things that are planned for MyAAC. Everyone is welcome to pick anything, implement it, and then create a PR (Pull Request).

Please follow some basic rules

### High Priority (ASAP)

#### There is problem with finding config.lua on linux

It's a problem with permissions file\_exists(config.lua) returns false, even though the file exists

The current solution is to set execute flags on every folder above ots path So if your config.lua (server) is located in: /home/myuser/forgottenserver/config.lua, then you need to execute following commands:

```
chmod +x /home
chmod +x /home/myuser
chmod +x /home/myuser/forgottenserver
```

And then refresh the installation page again and follow the instructions.

And here's the list:

* automatic updater of the AAC files (like in WordPress)
* use separate tables without modifing the OTServ schema (myaac\_accounts, myaac\_players)
* fundamental changes in Twig:
  * add option to write themes in Twig
* kathrine tickets - show/hide
* new configurables:
  * login\_session\_time
  * login\_fail\_attempts
  * login\_fail\_attempts
  * account\_identity = name,number,email
* move website from WordPress to github.io or readthedocs.org
* plugin auto-update and check-version
  * needs support from my-aac.org (plugins database)
* configurable session handler: file, database, php
* change global variables pointing to classes like $db, $cache to Singleton Pattern
* new command to install the AAC from command line
  * headless install
* i18n support (issue #1 on GitHub)
  * use some web-based translation tools
    * most preferably <https://weblate.org>
    * or: <https://crowdin.com/>
* extend forum
  * use avatars or player outfits (configurable)
  * colorful nicknames for different groups
  * profile page
    * change signature
    * update avatar
  * member since (in forum post)
  * better looking pagination (bootstrap) + configurable for each template (look: laravel)
  * go to the last post
  * select icon for the topic
  * forum - thread name instead of id in URL
* remove all copy-writed content

## x.x - At any time between (version not specified)

* better news archive with search function (like on the original game website)
* new lostaccount interface
  * that allows recover by email address
  * look on original game website, they got something there
* Export list of plugins as .json or .txt
* server data editor (web based file manager that shows and allows to edit the data folder)
* configurable items storage -> db (slower load\&parse, better search) vs cache (faster load\&parse, worse search)
* better looking email templates
* Achievements System

## Plugin Ideas

* First 100 (x) accounts receive points/pacc
  * limit per IP

## Template Ideas

* add support for menus/color/blank in rest of templates
* <https://vikpe.org/archive/arcsin-web-templates/demo/beautiful-day-website-template/>
* <https://templates.arcsin.se/demo/fluid-solution-website-template/>
* <https://templates.arcsin.se/demo/transparentia-website-template/>
* <http://www.css3templates.co.uk/templates/CSS3\\_skies/index.html>


# Supported servers

Thanks to our awesome database detection algorithm, we can support most of the distributions out of the box.

Tested to work with:

* TFS 0.3/0.4
* TFS 1.x
* OTHire
* Avesta
* OTX Server
* OTServBR-Global 12x
* Otserv 0.6.3, 0.6.4 and above
* TVP Engine (since MyAAC v2.0)
* BlackTek (Will be supported in MyAAC v3.0)


# Stripe

How to configure Stripe payments

The whole process consists of 3 Steps:

1. Add Webhook
2. Generate secret key
3. Configure payment options (in config.php)

## 1. Add Webhook

Visit Stripe Webhooks Page <https://dashboard.stripe.com/webhooks>

Click on "Create an event destination"

<figure><img src="/files/rYbriNux8shvGKL8jbPP" alt=""><figcaption></figcaption></figure>

You should see following screen, fill it as follows:

(replacing naturally your-domain.com with your domain)

<figure><img src="/files/usbJpOYu9ZO1Ezgh4hR0" alt=""><figcaption></figcaption></figure>

As **Endpoint URL** enter:

* For MyAAC 1.0+ and Gesior Shop System 6.0+
  * <https://your-domain.com/payments-notify/stripe>
* For MyAAC 0.8 and Gesior Shop System 5.0+
  * <https://your-domain.com/payments/stripe.php>

On the same screen, click on "Select events". You should see following screen.

<figure><img src="/files/cNobCJOGNC9zMUOu2ctq" alt=""><figcaption></figcaption></figure>

From the events select **checkout.session.completed**

This is the only event we need.

Then click on Add events button

<figure><img src="/files/79sgmXOw0z6vaitX0Uho" alt=""><figcaption></figcaption></figure>

And finally click on "Add endpoint"

<figure><img src="/files/YuLTXXgCTidbqgLBhlZu" alt=""><figcaption></figcaption></figure>

After that you should be redirected to your Webhook site

Click on "Reveal" Signing Secret:

<figure><img src="/files/4ZbXj3ajxX9v7B9htAI3" alt=""><figcaption></figcaption></figure>

You should see a key, which you enter in plugins/gesior-shop-system/config.php, in the Stripe section, under endpoint\_secret:

<figure><img src="/files/7KyVaZGl1xUUn6C3ZYyT" alt=""><figcaption></figcaption></figure>

## 2. Create Secret Key

Go into <https://dashboard.stripe.com/apikeys>

Click **Create secret key:**

<figure><img src="/files/0SDxBkM5KXyZ19O6e8no" alt=""><figcaption></figcaption></figure>

In the popup screen select the second option (Building your own integration):

<figure><img src="/files/kzbbFh2gpiomw8fxNwR4" alt=""><figcaption></figcaption></figure>

Finally, click on **Create secret key**

You will receive a mail, and also will need probably to confirm using Auth App.

When everything goes smooth, you should see your secret key:

<figure><img src="/files/3PI5vKDJyBtrwCUO7t46" alt=""><figcaption></figcaption></figure>

Enter in into same config.php like before under "secret\_key", here:

<figure><img src="/files/pW4RBJK76fRNcaO99GDx" alt=""><figcaption></figcaption></figure>

## 3. Configure payment options (in config.php)

Finally, you can configure the payment options in plugins/gesior-shop-system/config.php, which by default looks like this:

```php
	'payments' => [
		['price' => '10', 'currency' => 'USD', 'points' => '100', 'name' => '100 premium points on Your OTS'],
		['price' => '20', 'currency' => 'USD', 'points' => '200', 'name' => '200 premium points on Your OTS'],
		['price' => '30', 'currency' => 'USD', 'points' => '300', 'name' => '300 premium points on Your OTS'],
		['price' => '40', 'currency' => 'USD', 'points' => '400', 'name' => '400 premium points on Your OTS'],
		['price' => '50', 'currency' => 'USD', 'points' => '500', 'name' => '500 premium points on Your OTS'],
	],
```


# Commands

## About

The CLI interface to interfere with myaac is called: **aac**

It's php file like in Laravel there is **artisan**.

The whole concept is based on the Symfony component - Console. You can find a lot of documentation and how to write commands on their website - <https://symfony.com/doc/current/components/console.html>

How to use that? Just write in console (while being in myaac main folder): `php aac` - you should see a list of commands.

I will also try to summarize in this document available commands.

### List

Prefix each command with `php aac`, like `php aac cache:clear`

* cache:clear

  Clears the cache
* cronjob

  Runs the cronjob tasks, defined inside the HOOK\_CRONJOB hook
* cronjob:install

  Installs the cronjob script into crontab. It's like manually editing the cronjob using command: `crontab -e` and adding the line for every minute
* mail:send --subject="{your-subject}" {recipient}

  Sends a mail to specified user.

  * Options:
    * \--subject="{your-subject}"
  * Arguments:
    * {recipient} The recipient can be specified as: email, account name, or player name.
  * Example usage:
    * echo "Hello World" | php aac email:send --subject="This is the subject" <user@domain.com>
* migrate

  Runs migrations up to the latest one. Not required if "Database Auto Migrate" is enabled in Settings, which is the default.
* migrate:run {id or ids}

  Runs a migration(s) specified by the argument. Can be either id or list of ids. List of ids should be separated by space. This one is wild, because it doesn't change the database\_version in config. Advised is to use just `migrate` or `migrate:to`, instead of this one. Run if you know what you're doing!

  * Options:
    * \--down (perform downgrade instead of upgrade)
  * Arguments:
    * {id or ids}
  * Example usage:
    * php aac migrate:run 34 35 36 (Runs migrations 34, 35 and 36)
    * php aac migrate:run --down 36 35 34 (run downgrades of 36, 35, and 34)
* migrate:to {version}

  This one migrate from current version, to the selected {version}. It auto-detects if it's downgrade or upgrade, so the version can be either lower or higher.

  * Arguments:
    * {version} To which version should we migrate
  * Example usage:
    * php aac migrate:to 37 (downgrade to 37 version of database)
    * php aac migrate:to 45 (upgrade to 45)
* plugin:install {path-to-plugins-zip-file}

  Installs a plugin specified by path. Exactly the same as installing from admin panel.

  * Arguments:
    * {path-to-plugins-zip-file} Full path to the plugin .zip
  * Example usage:
    * php aac plugin:install "/home/user/myaac-powergamers-v1.0.zip"
* plugin:setup {plugin-name}

  Executes the setup/install part of the plugin. It's supposed to do required database changes/installing new tables etc.

  * Aliases (previously known as)
    * plugin:install:install (renamed in 1.7.1)
  * Arguments:
    * {plugin-name} Name of the plugin as specified in the .json name.
      * For the gesior-shop-system.json, it will be just "gesior-shop-system"
  * Example usage:
    * php aac plugin:setup gesior-shop-system
    * php aac plugin:install:install gesior-shop-system
      * Doing exactly the same, just an alias of old name of the command
* settings:reset {plugin-name}

  Resets the settings for the specified plugin, or all settings if {plugin-name} is not specified.

  * Arguments:
    * {plugin-name} - optional, plugin settings to reset, if not specified, then all settings will be cleared
  * Example usage:
    * php aac settings:reset
      * Resets all MyAAC settings
    * php aac settings:reset google-recaptcha
      * Resets only google-recaptcha settings
* settings:set {name.key} {value}

  Change/set setting specified by key.

  * Arguments:
    * {name.key} Name of the settings + key, can be also plugin-name + key.
  * Example usage:
    * php aac settings:set core.template kathrine
    * php aac settings:set core.template\_allow\_change false
      * Those both change the default template, and doesn't allow to change it by user

### Extending

You can add your own commands using plugins. Just create a new folder in your plugin folder called: **commands**.

Create file HelloWorldCommand.php and paste inside:

```
<?php

namespace MyAAC\Commands;

use Symfony\Component\Console\Input\InputInterface;
use Symfony\Component\Console\Output\OutputInterface;
use Symfony\Component\Console\Style\SymfonyStyle;

return new class extends Command
{
	protected function configure(): void
	{
		$this->setName('hello:world')
			->setDescription('Description');
	}

	protected function execute(InputInterface $input, OutputInterface $output): int
	{
		$io = new SymfonyStyle($input, $output);

		$io->success('Hello world!');
		return Command::SUCCESS;
	}
};
```

Now after using `php aac hello:world` you should see a message.